Setting Up a New Project |

|

|
A Citavi project is where you store all the information pertaining to a particular topic. You can create as many Citavi projects as you need, each of which can include as many references as you like. Please note that if you are using Citavi Free, you cannot save changes if there are more than 100 references in all currently open projects.
Creating a New Project
1.In the Reference Editor, on the File menu, click New project.
2.Choose where you want to save the project. By default, Citavi saves projects in Documents or My Documents in the Citavi 3\Projects folder.
3.Enter a file name, for example The History of Psychology, and click OK.
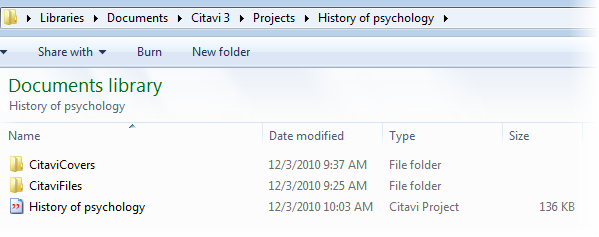
4.Citavi creates a new folder with the name of the project, containing the project file (The History of Psychology.ctv3) and opens the project. Now you can begin adding references or performing online searches.
Citavi creates a folder for each project with the name of the project. In addition to the project file, it contains two subfolders: CitaviCovers for any cover art in the project, and CitaviFiles for files linked to references in the project. These may include full-text articles in PDF format or scanned pages of a book.

If you want to enter a description of your project, on the File menu, click Project properties. On the Project tab, enter the description.
Deleting a Project
1.Exit Citavi.
2.Open the Citavi folder for user files (by default, Citavi saves projects in Documents or My Documents in the Citavi 3\Projects folder).
3.Delete the folder for the project by right-clicking the project name and clicking Delete.
Warning: Since the CitaviFiles subfolder is also deleted, any linked files will be moved to the Recycle Bin as well.
URL for this page:
http://manual.citavi.com/en/?new_project.htm (Last updated: 03.08.2011 15:51:00)
Still have questions? Please visit our Service Portal where you can search our Knowledge Base and send questions to the Citavi team.