Installing on a Mac
Right now, Citavi runs only on Windows. However, you have a few different options if you want to use Citavi on your Mac. There are three third-party solutions (Parallels Desktop, VMware Fusion, and Oracle VirtualBox) which let you run a real copy of Windows on your Mac. These so-called virtual machines run Windows at the same time as Mac OS X, so you don't have to reboot.
To begin, click the links in the text for each virtual machine vendor's instructions and downloads. The other things you need to check:
- You must be running a Mac with an Intel processor. Older Macs with PowerPC processors cannot run these virtual machines. (There is an obsolete emulator, Virtual PC, which allows Windows to on some PowerPC Macs, but it is discontinued and runs slowly.).
- You must have enough free hard disk space on your Mac to hold the contents of the Windows virtual machine.
- Running Windows at the same time takes a lot of memory (RAM), so we recommend having plenty of RAM in the computer, 2GB minimum, 4GB recommended for regular use. If you have too little RAM, it will still work, but everything will run slower when Windows is running.
- The Windows PC you are using in the virtual machine must work. You cannot use one of the third-party solutions if the PC can't be started.
This step-by-step guide will help you set up Citavi, Parallels Desktop, and Microsoft Word for Mac so that they work together optimally.
 What You Need
To run Citavi on a Mac using Parallels, you need the following:
Before you begin, you may find it interesting and useful to read the Parallels Desktop User's Guide. It covers the myriad features Parallels offers. |
Step 1: Install Parallels
The installation will run automatically once you start the Setup. If you need help, see chapter 2 of the Parallels 9 manual or in the document Getting Started with Parallels Desktop. |
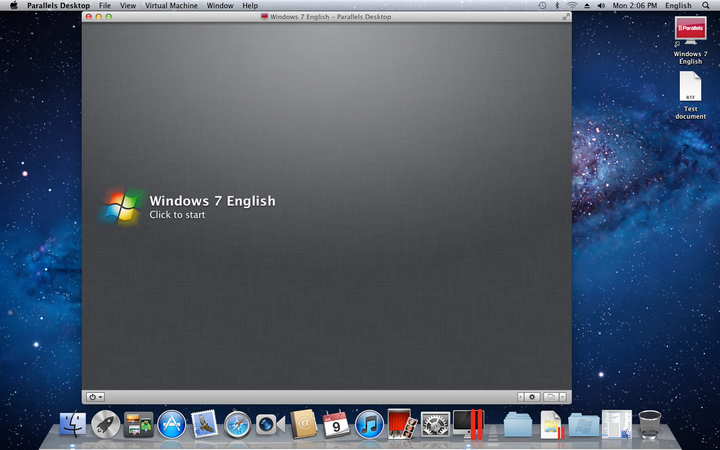
Step 2: Install Windows
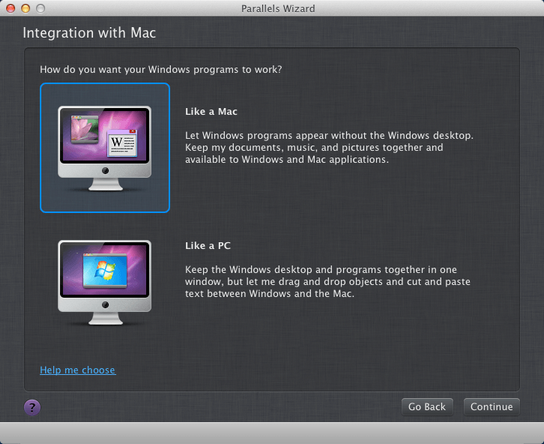
Depending on whether you have a Windows disc or .iso file, or whether you are migrating an existing PC, the process is a little different. To install from a Windows disc or .iso file, follow the instructions in the following guide: How to install Windows virtual machine on Mac using Parallels Desktop.Parallels Knowledge Base Important: At the Integration mit Mac step of the Parallels Wizard, be sure to choose Like a Mac. This ensures maximum integration of both systems, and the rest of this visual guide assumes that you selected Like a Mac. Additionally, this option saves your Citavi data directly on the Mac, where Time Machine can back it up automatically. This is much, much safer for your data than storing it in the virtual Windows hard disk!
If you do not use the Express installation option, or if you migrate an existing PC, be sure to install Parallels Tools if it doesn't happen automatically. Complete instructions for all the installation scenarios in Parallels can be found in chapter 3 of the Parallels 9 manual. Hint: We recommend that you install and use antivirus software in your Windows virtual machine. Free antivirus software is fine. |
Step 3: Run Windows Update
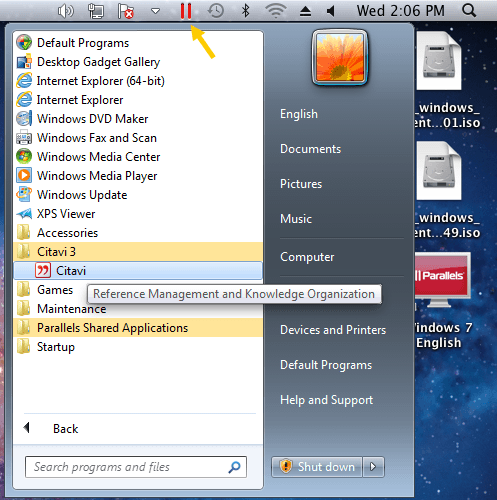
No matter how new your copy of Windows is, there are always updates for it, and to ensure maximum security of your system, you want to have the latest updates. Right-click the Parallels menu in the menu bar to show the Windows Start menu. Begin typing Windows Update in the Search field and then click Windows Update to begin.
Run Windows Update repeatedly until no more updates are offered. In particular, on Windows Vista it is critical that the .NET Framework 4.5 is installed. |

Step 4: Install Firefox and Adobe Reader (optional)
If you want to use the Pickers in Firefox and Adobe Reader, you will need to install the Windows versions of each of those programs. For each one: 4.1 Download the program from the respective website. Firefox: www.getfirefox.com It doesn't matter whether you download with your Mac or Windows browser. 4.2 Run the downloaded setup file. (Unless you chose another folder, it will be in your Mac's Downloads folder.) When you double-click the setup file in the Finder, it will open in Parallels. |
Step 5: Install Citavi
5.1 Visit www.citavi.com/download and download the latest version of Citavi. It doesn't matter whether you do this with your Mac or Windows browser. 5.2 Run the downloaded CitaviSetup.exe (Unless you chose another folder, it will be in your Mac's Downloads folder.) When you double-click it in the Finder, it will open in Parallels. 5.3 If you have existing Citavi projects you want to migrate, copy the Citavi folder for user data (by default, that is the folder Citavi 4 inside Documents) to your Documents folder on the Mac. |
Step 6: Unlock Citavi Team, Pro or Reader
To use Citavi Team, Pro, or Reader, you simply need to enter your license key. 6.1 Start Citavi
6.2 Enter Your License Key |
Step 7: Optimize Citavi
These steps will set up Citavi for optimal integration with the Mac. 7.1 Set Citavi to Cite Using the ClipboardSince Citavi cannot communicate with Word for Mac directly, you have to paste Citavi placeholders into the text manually. To make this easier, you can set the Publication Assistant to copy the placeholder to the Clipboard just by double-clicking. Here's how:
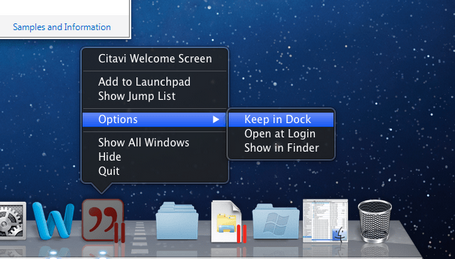
7.2. Add Citavi to the DockYou may have noticed that when Citavi is running, it appears in the Dock (with a small Parallels badge to show that it is a Windows program). You can keep the Citavi icon in the Dock, so that a single click will automatically open Parallels, start Windows, and start Citavi.
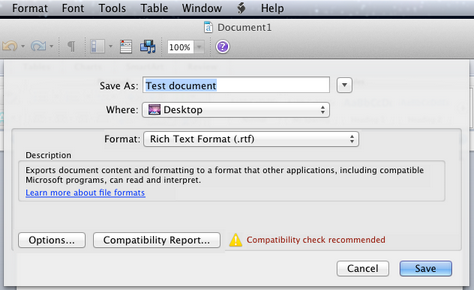
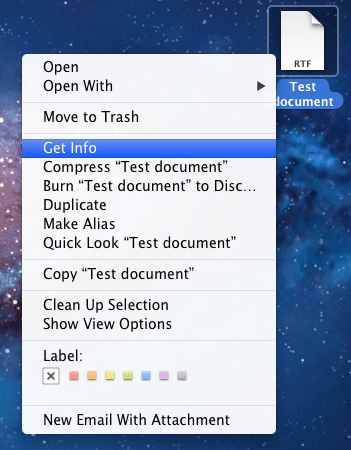
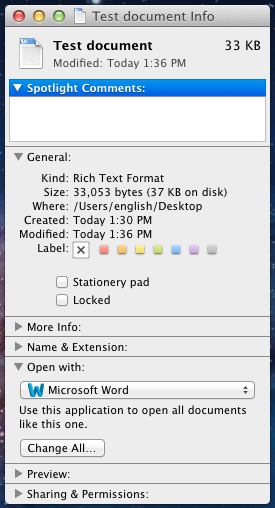
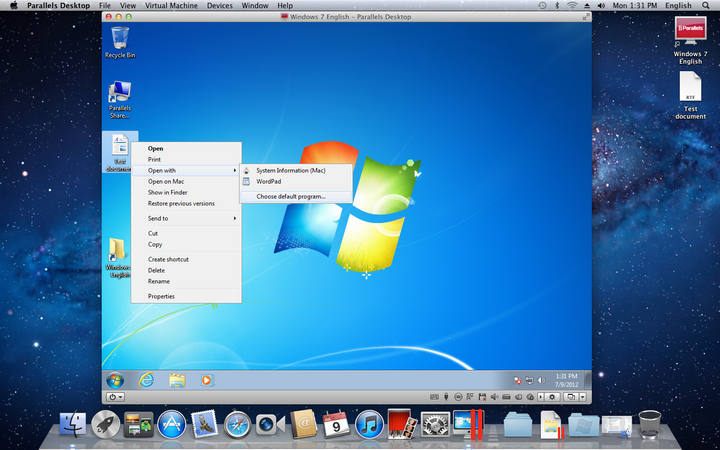
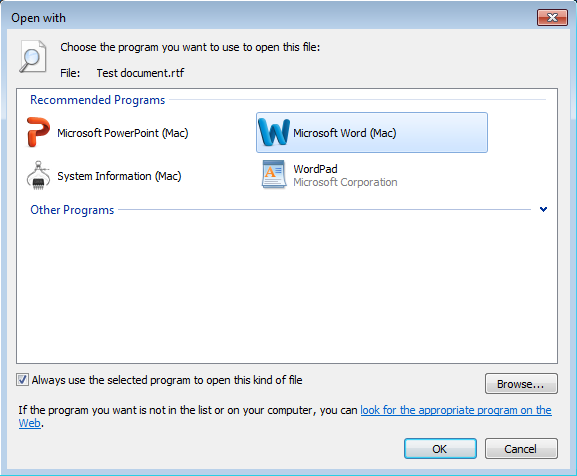
7.3. Set Word for Mac as the Default Program for RTF FilesUsing Citavi and Word for Mac together relies on saving documents as RTF. (Don't worry, this won't alter your documents.) By telling both Windows and Mac OS X that you want Word for Mac to be the default program for RTF files, formatting your documents will be just as seamless as on Windows. 7.3.1. Configuring RTF on Mac OS X
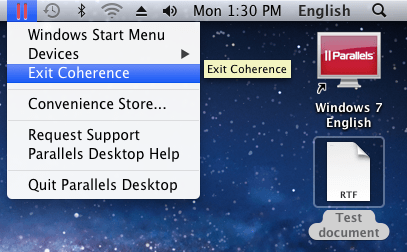
7.3.2 Configuring RTF on Windows
Hint: If Microsoft Word (Mac) does not appear, click Cancel, then on the Virtual Machine menu, click Configure, then switch to the Options tab and click Applications in the left column. Clear the Share Mac applications with Windows checkbox, wait at least a full two minutes, then select the checkbox again. Wait another two minutes, then continue at step 2 again.
|


Step 8: Use Citavi to Write with Word
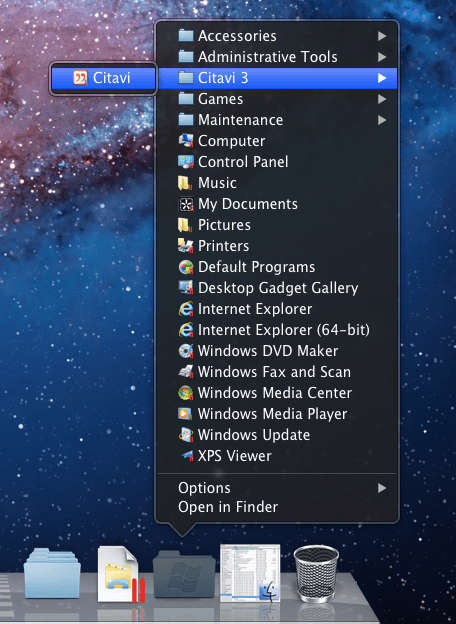
8.1. Starting CitaviYou can start Citavi any of the following ways: • Click Citavi in the Dock, if you added it in step 7.2. • Click the Windows Applications folder in the Dock and click Citavi:
• Press Command-Space bar to open Spotlight and then type "Citavi". • Start Parallels, right-click the Parallels menu in the menu bar, and start Citavi from the Start menu.
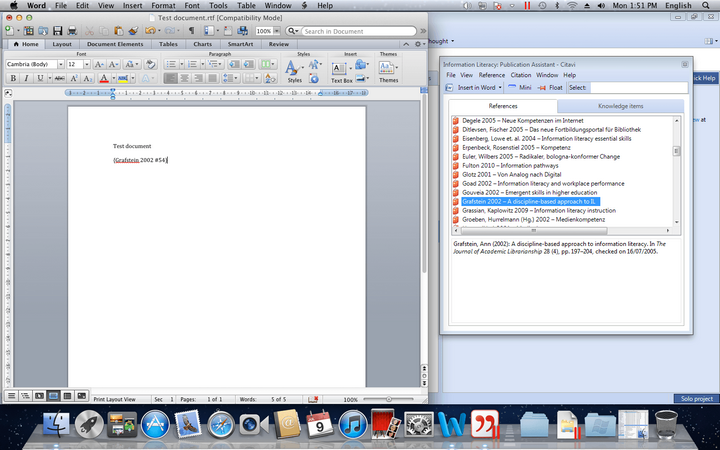
• Double-click a Citavi project file (which you can recognize by the file ending .ctv4 oder .ctt4). 8.2. Using WordUse Microsoft Word for Mac to write your paper. When creating new documents, go ahead and save them to RTF format (Rich Text Format) from the beginning. Then you won't have to worry about converting later. A few features in Word 2011 and 2008 are unavailable when saving to RTF; unFortunately, there is no way around this. 8.3. Using CitaviCitavi running in Parallels works just like Citavi on a Windows PC. Use all of Citavi's features as you normally would. The only exception is the Pickers. These only work within the Windows environment, so if you want to use the Pickers, you must use Internet Explorer, Firefox, or Adobe Reader for Windows, even if you have the Mac versions installed. Refer to step 4 above. 8.4. Inserting Citavi Citations and Knowledge Items into WordWhile writing, when you need to insert a citation or a knowledge item, switch to Citavi, then on the Citation menu, click Publication Assistant (or press F7) to open the Publication Assistant. Find the reference or knowledge item you want to insert, then double-click it to copy it to the Clipboard. Switch to Word, place the insertion point where you want to insert, and paste the Clipboard contents into the Word document. 8.5 Formatting the DocumentIf you haven't done so already, save the document in RTF format. Then in Citavi, on the Citation menu, click Format publication, select the unformatted document in RTF format and proceed with formatting. When Citavi asks if you want to open the document in your word processor, click Yes. The formatted document should open in Word for Mac. |
Step 9: Shut Down Windows
9.1 When you're done using Citavi, the very best thing is to fully shut down Windows. To do so, right-click the Parallels menu to open the Windows Start menu, then shut down as you would normally. Do not quit Parallels until Windows has finished shutting down!! When Windows has shut down completely, you see this screen:
9.2 If you are in a hurry, instead of shutting down Windows, you can suspend it. To suspend, just click the Parallels menu and click Quit Parallels. Parallels will quickly save Windows' state. When you start Parallels again, it will resume Windows as it was. There is, however, a slightly higher risk of data loss with this method. Warning: Do not force quit Parallels, and do not use the Stop command in Parallels unless the Windows virtual machine has crashed.Both of these can lead to data loss, the same way that unplugging a desktop PC while it is running can lead to data loss. Always shut down or suspend Windows as described above. |